After my order just went by three days to me our postman pushed the package in his hands.
Once again, Amazon and instructed dealers deserve high praise - so the shopping is fun!
My doubts about the unfamiliar brand and the very reasonable price scattered at once,
when I opened the package: carefully packed all components and well-ordered. In addition to the device and a
lightweight electronic power supply amounted to a LAN cable and three antennas, as well as short-manuals
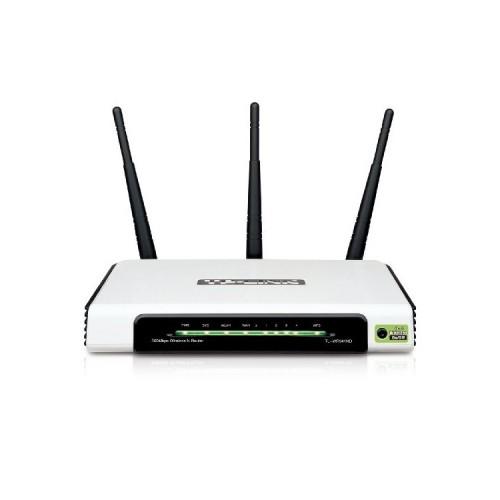
and a mini-CD with setup routine and a 92-page manual in .pdf format. The WR941 ND makes a
quality impression is (at least outwardly) processed very well and is relatively stylish therefore, namely
with a glossy white surface and matt black on the sides. Thus he makes in modern surroundings
a bella figura, especially a wall mounting is provided.
Now to the technical:
The technical data of the WR941 are well known. The scope is impressive and can the
most expensive brands hold a candle.
The setting 'medium' in the wireless field strength enough already, to bridge a floor.
All my wireless client (laptop, mobile phone, PS3 could get in contact immediately with the new Wi-Fi network.
Although the TP-Link is by its very nature, a router, he also works as an Access Point. Exactly what I wanted!
Since IT moderately biased, I have no need to use the Setup CD.
The establishment of the WR941 is easy for some IT-savvy users. If the following points are observed, it grants
prompt access to its configuration menu.
Device as a router:
- The device must be done via a laptop / PC via the (supplied) LAN cable.
- The DHCP service on the notebook must be switched off
- WAN jack the router must be connected to the DSL connection socket
- The IP address of the laptop has to be at least temporarily switched to the subnet of the router
- Access is by entering the router address (in my case: 192.168.1.1) in the browser
- Then the menu pops up, and an assistant takes the users happy until the end of the device to the hand.
- Move all the necessary settings such as encryption, MAC filtering etc. are then made
- The IP address should then be changed in the sub-item 'Lan' and should be in the subnet of the home network.
Caution: After the router is of course only be reached at the new address!
The crowning glory is the reboot of the router. Now the WR941 should enter service as a router.
Device as AP:
In this case, do an existing router his service in the home network, anywhere in the roof or basement,
so that the WR941 serves as an additional W-LAN access point.
Here a little more manual labor is required. End in principle as described above with the following differences:
Important:
The W-LAN jack WR941 must not be connected because the routing function is not required when an AP.
Instead, the LAN cable is plugged into one of the four ports on the WR941 and connected to the LAN socket.
In the configuration menu under 'Wan' a speak dummy IP address is entered for the WAN port,
eg 169.174.13.3.
Again, the initialization of the new values takes place only by rebooting the WR941.
Although the TP-Link only a few days with us is in operation and I nothing about durability and quality
the installed electronics can say, I think the price / performance ratio for unbeatable and think
that the WR941ND deserves full 5 stars!