Neutral:
The lighting consists of 2 halogen bulbs candles a 27 Watt.
(2 LED bulbs with 4 Watt would almost equal brightness result)
Unfortunately, it is hardly possible to exchange the two halogen bulbs, because the base of savings and LED bulbs are a good 2 cm longer. Thus, the light source is shifted each to left and right at the outer edge of the cover plates, whereby the illumination is no longer so optimal.
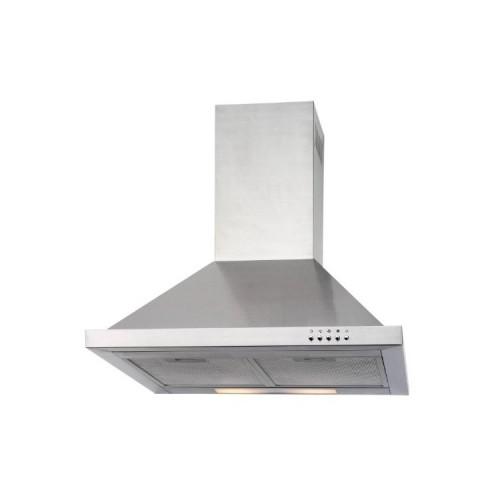
The case:
From the front, OK, from behind alas.
Rear stand above all screw heads and those are a whole lot.
Here you should definitely rectify itself !!!
(Cloned was here in some reviews, the noise level, which certainly as a result, the cap only applied in the normal state with the screw heads on the wall and thus roars)
Remedy:
I have around 1,5 cm wide self-adhesive felt strips attached.
Furthermore, on the surface of the back, so the screw heads around. (Not over the screw heads!)
It may be that this noise is much lower.
(Self-adhesive felt strips and plates can be found in any hardware store)
The mounting hardware:
Taking best be gone.
The plugs are good for nothing, the included screws are too thin. (Eighth anchors and four screws ... That does not fit)
The installation of the hood itself is relatively simple with good plugs and suitable screws.
Negatives:
The installation of the chimney can lead to despair!
The installation instructions are not quite evident here. At the lower part of the chimney should be screwed back a brace and then the lower part are bolted to the hood.
After that, the shell will be extended to the desired height.
Well said, but if you have the screws halfway well-dressed, the upper part can no longer move.
So again ... Disconnect the chimney from the hood and thereby take good care that he does not get loose and fall off. (Macken on the hood, the countertop or even at the stove would be the consequence)
Now you have to try, as we must firmly tighten the screws of the cross-connection in order to push the upper part still can.
But be careful! Once the fire is bolted to the hood, the voltage and then it is quite possible that the shell no longer be pushed changes.
Then the whole process starts all over again.
If you have finally made the number, only the crossbar must be fitted at the top rear of the upper part.
With this cross-member, the upper part is fixed to the wall.
If you have cultivated the crossbar and pushes the upper part up to the ceiling, then you can no longer mark the dowel holes.
This means dismantling the crossbar again, measure, aimed, Mark and fasten the cross brace.
(For eighth dowels are also provided. A joke, here are two of six anchors more than sufficient)
Now push up the upper part, hope that you have not made a mistake, and screw the top of the crossbar.
A flexible sealing the fireplace to the ceiling is not included.
Here's a bit of advice.
Remove the foil only after complete assembly of the hood!
For suppliers:
Long delivery time.
Delivery by transportation company was announced.
At the same time you will be asked to unpack the hood and examine for damage.
The driver must wait as long. (At least, the supplier)
Delivery was then made by DHL and these drivers do not wait until you've unpacked and checked the delivery. (This can be the drivers do not expect)