In general, the description and measurements is poor and therefore could be a bit better and more accurate.
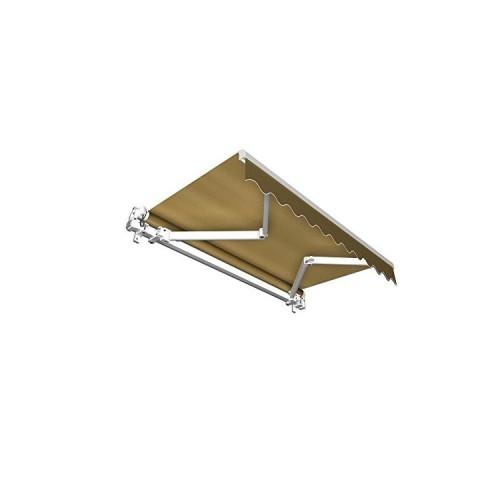
295 x Since I bought the 250 Markiese, I am the assumed according to the description, the measurements are also indicated accordingly.
Unfortunately, I have found this nich but only 294 x 250 is, indeed differed only 1 mm but a lot of if you have only a few mm for deviations of the drill holes, so you should take their own measurements, wass I would personally recommend not then awaken evil just comes if you like me need thermal anchor.
If the awning is then tuned it served its purpose, the awning can be up to 30 degrees inclination angle set.
Advantages of an awning you do not need a parasol with parasol stand of takes away a lot of space and is also schwehr.
The awning consumption only and are turned off.
For people those who want anbrinen awning at a house wall with insulation (Stüropor), I have listed below the steps at high speed. But you should still follow the instructions.
Note 2 Thermal dowels / Thermaxdübel cost about 40, and the adhesive (bonding mortar) costs about 20, had a total of about 120, - extra, because it takes a total of 4 thermo, Thermaxdübel and at least 2 Katuschen glue (composite mortar) for dowels approx 1 Katusche for 2 dowels.
I have attached the awning on our house wall with 10cm insulation (Stüropor) It should be noted that if you live in an apartment building the landlord informed whether Gelenkarmmarkiese you may place, unless there s also Klemmmarkiesen.
Since I have 10cm insulation I had to Thermo dowels / Thermaxdübel bring with M12 threaded rod fits for the wall bracket.
Then drill the hole on the anchor length approx 13cm + 10cm insulation, a total of 23cm (hole depth).
Then the hole should be cleaned with a vacuum cleaner etc. pp. and then slide the anchor with threaded rod into the hole and remove the threaded rod again.
After that, the adhesive should (there are extra adhesive for thermal / Thermaxdübel) are pressed into the drill hole and then quickly into the threaded rod as it is pretty fast hard.
Then the wall mount it stuck so you just come about.
If everything has been considered and everything is fixed, you can attach the awning to the wall brackets.
PS: if it were not such elaborate work but would back this skill now I pile holes in the facade and then not also looks good.
Most of what I have been annoyed are at short distances between arm holder and shaft mount and wall mount you can not vary as only two normal holes were drilled (for M12), the color of the awning (not as shown) and an articulated something down hanging.
Personally, I must say that I would have expected more for this price so times not even plugs etc. pp. available.
Therefore, I give generously 3 stars, compress with 2 eyes.
But perhaps I had ne Monday awning !!!!!!!!!!!!!!!!!!!!!!!!!!!!!!!!!!!!!