Preliminary note:
=============
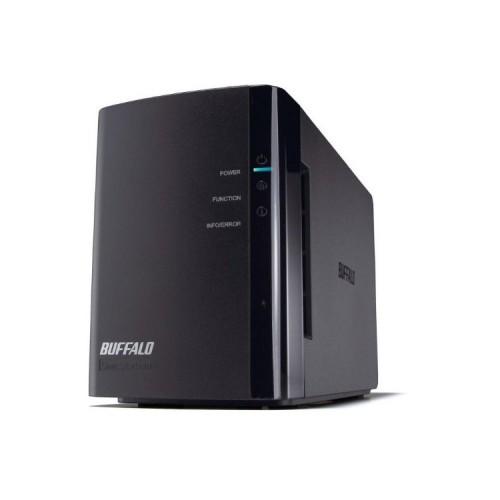
I drew some time procuring a larger hard drive into consideration. So far, I have several USB 2.5 drives, a 500GB and a 1TB USB hard drive. Mainly I have it created videos in AVI format. A mini DV or Digital 8 recording requires as raw about 13 GB of data per hour Time. There are, of course, backups of DVDs produced therefrom and a few thousand digital photos of countless family events of the last decades. With my satellite TV card I have made a number of recordings in MPEG2 format and last but not least, I'm just going to digitize my old vinyl records and CDs. Since a lot of data coming together! As luck would have it sometimes, I saw about 2 years ago in the media market Flyer a NAS device on sale: The Buffalo LinkStation Duo 2TB for a mere 199 EUR. Even Amazon back then could not keep up with the price.
So I went quickly to the media market and was able to get one of the last 3 drives.
Actually I wanted to buy just another external hard drive, but the thought of finally having a networkable solution was too tempting.
Technical Specifications:
=================
Even if you can read the technical data from the manufacturer, I would nevertheless like to mention the main points in short:
-Capacity: 2 hard drives (Seagate), each with 1 TB and 7200 revolutions / min
-10/100/1000 GBit LAN
Hardware RAID 0 and 1
-on- And Off (via PC)
-Bittorrent Client
-PHP & MySQL Server (Thus I could host my blog on my NAS drive)
-SMB And FTP shares
-iTunes support
-Direct Copy of USB devices via USB port
-Integrated DLNA server (Do we need to access many of DLNA-certified devices such as the
currently available on the market flat-screen TVs or my Samsung Galaxy S I9000)
Power depending on average about 21 watts
-Administrierbar Via HTTP web interface
Scope of supply:
=============
In the small box a lot of accessories are included and there are also all the cables, so that nothing has to be bought:
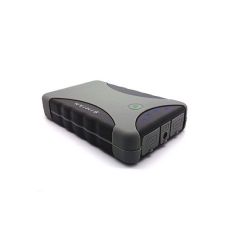
-Buffalo LinkStation Duo drive with 2 Samsung hard drives (each 1 TB)
-Netzadapter With cable
Adapter with additional on / off switch (I equal to my external USB hard drive without
Have connected on / off switch)
-UK Power cord (Who needs it)
-Netzwerkkabel (Flat cable)
-Manual
Installation CD
Processing:
=============
Here I had to find some shortcomings. When I took the drive out of the box, it rattled violently. Sure, there's something broken, I thought to myself. Since I am curious by nature, I have tried to remove the front panel, which also came with a little gentle force. Among I discovered the cause of the strange sounds. The two Seagate hard drives sit slightly loose in the housing and for removing it from the same sheet metal nipple is above each plate attached, where you can pull it out. Since this lie quite loosely, the reason was thus found. The entire casing is made of plastic and looks a bit cheap. Overall, however, be accepted because you always have to look at the relation to the price and a better processed drive costs considerably more even.
Commissioning:
===============
Commissioning is relatively easy: After connecting the drive to the power supply (IMPORTANT: switch on the rear to ON, NOT AUTO) and the switch to install from the CD to the NAS Navigator 2 and possibly even the add-on software (backup tool, manual etc. ). After the hard disk is searched on the net and found after a short time. There unfortunately already the next negative point: The AUTO function should serve the hard drive at the same time on or off with the computers in the network. This works perfectly. Who, however, such as a Playstation 3 calls his own, this function can not be used. To this end, there is no NAS Navigator. Therefore remains only the hard disk manually turn on or off or to use the timer. Unfortunately, the timer will only work in ON mode, so that when computers with installed NAS Navigator 2 the automatic startup and shutdown of the NAS drive is no longer possible. After a few months I noticed that the power switch is not always responding and you have to temporarily disconnect the drive from the power supply before the switch responds.
Now you should think about whether you want to 0, 1 or no RAID using RAID. RAID 0 means that both hard drives are combined into a single. One has the full capacity and accesses both disks to as if it were a single. However, if only one hard drive, all data is lost. The reason is that the fragments of a file are distributed to both disks. RAID 1 mirrors the data on both disks, so that one does have resiliency, but is only half the capacity. There are NAS drives that allow the selection of sub-regions for RAID 1, that one can use, for example, 200 GB each disk for RAID 1 and separately manage the rest. The Buffalo LinkStation Duo can not unfortunately. Since my ultimate goal was the maximum capacity and still is, I opted for none of the two solutions. I manage both hard disks separately, since I still possess enough external media to drive backups. Using a tool such as Robocopy, allows the script controlled accomplished relatively quickly, since it only changes are copied.
The operating noise of the drive are relatively quiet despite an existing fan. At present it is still under my desk and you do hear it only when you focus on.
Although the hard disk had to surrender as of July 2010, had not installed the latest firmware. Therefore, I had carried out a firmware update to version 1.34, currently it stands at 1.68, which is necessary for the operation with larger hard drives. You get offered to download on the manufacturer's website. After unpacking a nearly 180 MB ZIP file, you start the Updater, which automatically performs the firmware update with a few dialogues.
Administration:
===========
About the NAS Navigator 2 can be the http link for the Management Console access. The default password should be changed for security reasons the same as the first. There are now a lot of settings, of which I only mention the most important for me:
Shared Folders: Here you can specify the folders may be accessed from the computers connected from. Each folder can be authorized per user or per user group define (Reading, reading and writing). This makes sense, for example, so as not to leave shots with age ratings get each family member. The permitted access methods are configurable here (Windows SMB, Apple, FTP, SFTP, Disc Backup).
Users / Groups: Here you can create users and groups. So we can summarize all users with the same permission on a folder (eg, music) in a group for simplicity.
The Network tab allows not only the configuration of the conventional network parameters to operate as a web server inkl.MySQL Server. It is even possible inclusion in a domain.
Under System -> Memory does one determine which mode you want to use the drive: RAID 0, RAID 1, or normal mode. The default is RAID 0. To operate in normal mode I had the RAID 0 so once delete (to array and then click Delete). Under System-> Settings you can configure the name of the drive, as well as the time and date manually. The Network Time Protocol (NTP) time and date are automatically configured. The timer can be activated> Power Management across system.
Under Extensions-> Media Server is for the use of DLNA Media Server Enable the first to which can also be configured yet very detailed (access lists, media list, etc.). WebAccess, Bit Torrent, Print Server, and Time Machine I do not use.
Fortunately you have here only a few times to configure anything because the Web Front End reacts extremely sluggish.
Dubbing the data:
======================
The next step is to obtain the data on the hard drive. Before data be uploaded, you should be aware of the structure of the data and permissions clear.
There are several possibilities:
Direct Copy via the USB port (USB connection is not suitable to connect the drive to your PC !!!)
Filling the hard drive over the network (using FTP tool like FileZilla or directly on location with the Windows Explorer)
Here much depends on the network bandwidth. Unfortunately I have the existing telephone cabling (4-pair) combined as a network and ISDN cable connected via a patch panel. Thus only 100 MBit possible. But you If the computer and the NAS drive to a 1 Gb switch connects, it does not matter. I first transferred the data via the existing 100 Mbit switch, which at a maximum of 12 Mbytes / sec. very long lasted. So I bought another cheap gigabit switch.
Theoretically therefore should 125 MByte / sec. Transfer rate possible. Practically I did not make more than 40 MB / Sec. After some research on the net turned out that this is probably normal and also depends on the size of files to transfer.
Access over the network:
===================
The access over the net went smoothly from any computer. You should only install the NAS Navigator 2, as thus also the configuration in the network is performed automatically. Even easier is the access to a DLNA-enabled device. The Samsung Galaxy S I9000, it is sufficient to start the app AllShare and you've got access to all the media content. One closes then the Galaxy to your TV, you have a fully functional media player. With my T-Mobile MDA Compact V access worked well, but was a little more complicated, due to the lack DLNA function.
To prevent loss of data on local computers, store all connected computers their data such as texts in each user folder on the drive. In conjunction with the Offline Files feature of Microsoft operating systems, the data can then be retained both locally and on the server and are still available if a component fails. Especially in such important data as CVs, cover letters, etc. should not do without you on it.
Upgrades:
===========
This point very, very long occupied me. After nearly 3 years 2 x 1 TB are really no longer state of the art as the saying goes. When the first 2 TB drives came on the market, I thought about it, as there was the first 3TB. Then the flood came in Thailand and the subject was forgotten because of the high hard drive prices. A few days ago I then slammed and bought two 4 TB hard drives. In the FAQ of Buffalo only a 4 TB is available for this model classified as recommended, the HDS724040ALE640 or even H3IK40003272SE (This is the same model, only with a different name).
The upgrade in normal mode was very unspectacular. I had feared the worst. First I secured the data on the 2nd HDD and built a first of the two 4 TB hard drives. The LinkStation drove then easily back up and I was able to format the new drive in the web interface, which lasted only a few minutes. Took longer to back up the data of the 1st hard drive, a total of nearly 30 hours After that I also swapped out these problems.
If you consider that the LinkStation Duo with 2 X 4 TB just costs around 480 EUR and I got the two hard drives for 320 EUR, the saving is still very large.
Conclusion:
=======
I have the drive is now almost three years and I'm still very satisfied. Otherwise I would not have been upgraded to 2 X 4 TB. But there are also negative aspects. Therefore, I summarize the pros and cons once briefly:
Positives:
-Cheap Price
-Leise And compact
-Very Versatile (DLNA, Web Server, Print Server, etc.)
Negatives:
Timer can not be used together with the NAS Navigator 2.
-very slow management interface
-Transferraten Somewhat low (12 MB / sec write. And 45 MB / sec read.), But sufficient for FullHD
To stream material