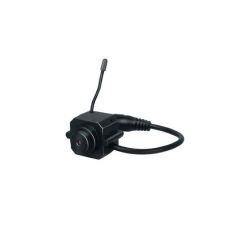
When I unpacked the Cam I was first surprised! An outdoor IP Cam wrapped in a really good, outdoor tauglichem metal housing! Had expected with a plastic housing. Even the inner life and the inner parts: watch out!
My expectations were exceeded.
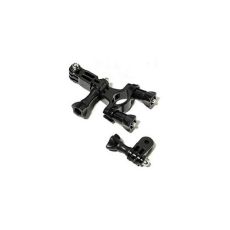
Installation of heating: easily
Installing the Wide angle: also fine, but is just necessary n bissl sensitivity.
With both an illustrated guide lies, which step by step explains the conversion; so who can muster the necessary sensitivity, should get to the assembly no problems.
the only drawback for Outdoor is the AC adapter and the connector, so only 4 points. My solution to this I've described below.
For Camera itself: The functions are sufficient to configure the thing. Maybe make the initial installation with a cable before I hang it on the same Wi-Fi, you do much easier to order!
Frame rate and Bildqualtät are very good for the price range!
WebInterface: sufficient, and IE Plugin: good
The motion alarm reacts n bissl arg lame, but as I look back on just then the price and tell me, for the money, not a thing!
If that is too lame or so rum gripe or even that you can make the detection window with the extra software for 20 ... there are cams that can do better, but also more cost accordingly!
I've now been installed some IP cams in my life; One thing is clear ne ne Axis Mobotix or better equipped, more configuration options and and and ... but I do not know if I want to spend up to monitor my private front door ... 800 or I would want to have, just as explain I do my sweet and what I say to her when she once again wants to buy shoes? ; D
My conclusion: very good outdoor cam for the money! If you want to put a live stream or snapshots to (internal or external) FTP server will probably easily find a better deal!
Next purchase of instar is the pivotal OurdoorCam for the garden. ^^
Now even n Tip For those who have an Android tablet or -Phone: IP Cam Viewer Basic or Pro, INSTAR cams are pre-installed.
So and now even my solution for the power supply and plug: I've built the AC adapter apart, left the electronics in the upper cover, the lower part disposed with the connectors and terminal blocks are connected directly to the power cable (and all isolated accordingly!) , The whole thing came in a correspondingly large IP-55 junction box.
Only the relatively large RJ45 connector for LAN prepared rack my n bissl head. The upshot, which came in a small IP55-junction box, which just a small cut into the housing and the rubber seal was, so I was able to pass the cable through the cut and not "traveling" through a hole had. With electrical tape abgedichtert, finished.
And because of warranty loss of the power supply ... hmm yes, a new costs 9.99. ;)
Material cost: 2.50 for 2 IP 55 cans. Luster terminals and n bissl electrical tape. expenditure of time 10 min. And hey ... I'm not the artisan of God's Ganden! ;)
Hope it helps one or the other.
Addendum: I always read, that would be not to use the Cam outdoors ?! So for me it was led in October outdoors via WLAN ... even during Saukälte mid-February (down to -18 ° C at the front door). However, I have also built the small heater, which are extra to buy it ... Electronics's just sometimes sensitive to low temperatures.