
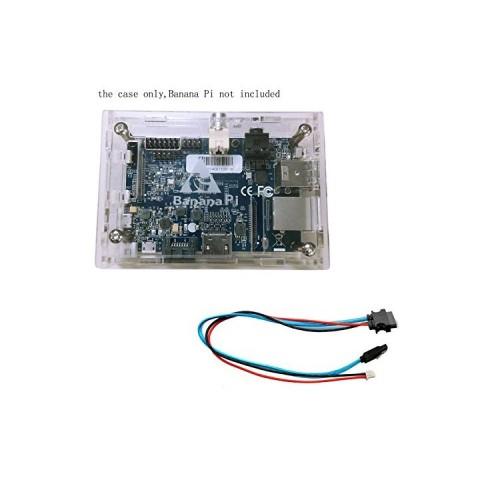
Is supplied in addition to the SATA connector cable the six housing parts, four small and four large spacers and eight screws. Sorry, no manual. All parts are covered, the removal of the protective film is a bit fiddly, but better so than scratched parts.
The screws are outside, the small spacers under the board (where the processor sits), the large it. First you screw the small spacers in the lower plate (be careful, this is _not_ symmetry!). Then you put the four side walls to the board around together and then all together in the lower plate. Now come the long spacer And last, the upper plate (this is labeled, here you can not go wrong).
All connections, even the windy button the board are available. Who uses the GPIO pins, maybe the wired before the final screwing. The housing makes first a stable impression, whether it is aging rapidly and decays, the future will tell. Just is not yet clear whether the banana scorched in the housing in its own juice. My experience with a Raspberry Pi + housing was that the temperature is abruptly down to ten degrees, if you had put the case on a longitudinal side. We will see ...


![The Sims 4 - Get to work - Expansion Pack - [PC] (computer game)](https://img.tgreer.com/thumb/85x85/f/60/f60bea1a9e185a9e.jpg)


![Project CARS - [Playstation 4] (Video Game)](https://img.tgreer.com/thumb/85x85/a/5b/a5bcef5afbcf5ade.jpg)


![Rocksmith (Incl cable.) - [PC] (computer game)](https://img.tgreer.com/thumb/85x85/5/bd/5bddbb5f918124e3cea7682802d9dcda.jpg)


