Benefits:
=======
- Easy to install (see notes for mounting)
- All options, ie screws, dowels *, washers, Allen key included and clearly packaged. (* Not suitable for all ceiling materials)
- Succinct but sufficiently comprehensive guide
- All parts of durable metal
- Contact arms to the projector are very flexible adjustable and therefore adaptable to the screw holes of the projector
- Nuts for beamer mounting in M4 and M6 included (M4x16, M4x40, M6x16, M6x40, 4 pieces each)
Disadvantages:
========
- Only two fixing screws to the ceiling. In low-weight projector or stable blanket no problem (for me reinforced concrete).
- Conveniently produced, in part, the letter need some more power in order to be screwed into the ceiling bracket. (Caution, not go the screws in the projector, which must turn slightly!)
Notes for mounting:
==================
The included manual covers most already off, but is still very scarce.
Here are my experiences
- Instead of the supplied dowels noname I prefered to take 8-Fischer plugs
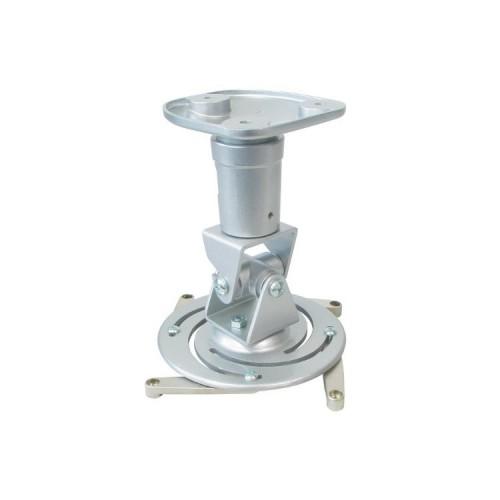
- The bracket is roughly made up of three elements:
* The foot, which is screwed to the ceiling (see step (1) of the Instructions)
* The center piece, which is screwed to the foot (see step (2))
* The projector attachment, which also includes the joint. (See step (3))
The following sequence has been working well for me:
1) Preparation
* Beamer lay upside down on the table (with a soft cloth under it)
2) First assembly
To (4) Assemble * Beamer Mounting according to step (2) the instructions and attach to the projector. Omit step (1) thereby.
Tip:
The holder can be centered on the best, if the screws ("C" / "D") on the projector and the mounting screws of the arms ("B") are a little loose. After centering (best under the focus of the projector) tighten the screws.
* If the screws to the projector, the old DIY motto "After firmly comes from!" note, not to Dolle.
* Foot and means centerpiece screw together (not yet on the ceiling screw)
* Centerpiece mount and tighten in beamer attachment. Adjusting screws of the joints only times pull a little harder so that centerpiece and beamer mounting not disengage.
Search 3) Position
* Optical Beamer Zoom in middle position (for future corrections if the position but not quite true)
* With the projector to rise up the ladder, turn it on and see if the distance to the wall right (image size, angle).
* Note, I do not assume liability for people let the projector drop or fall off the ladder. When Yourself to be careful! Everyone must consider himself, if he / she holds my approach was a good idea.
4) Marking
* If the correct position is found, mark through the holes in the ceiling bracket on the ceiling where you have to drill.
* It would have been helpful to have a second person would be characterized with its own conductor, while the first person holds the projector.
Check 5) drilling site
Drop * Beamer again gently upside down
* By the usual means, eg cable locator - check vermutbare cable runs, etc., the marked points on the ceiling for possible power lines, gas / water pipes (> Hardware).
6) Unscrew the feet from the center piece back and attach to the ceiling
Screws 7) centerpiece to the foot
Hook 8) projectors with bracket in the center piece
* Previously, if necessary the screws further open so that the chopping of the middle piece between metal and washers fit.
Strong enough pull * Screw the joints so that the projector will still move, but can not fall out.
Align 9) projectors. Remember that he still pretends when screwing something. To align using the rotation between centerpiece and foot.
10) joint Tighten the screws, as the grub screw in the center piece. For corrections joint screw / grub screw slightly open again.