
Mounting on the map = easy. One wonders if we will get there but it is all alone with a little time, and the fact of not having glue need helps. We follow the patterns of the record and a large sandwich is made with the PCB of the graphics card in the middle. The slightly different layout of my card stopped me from finding waterblock in the past. This product is assembled there without worry however.
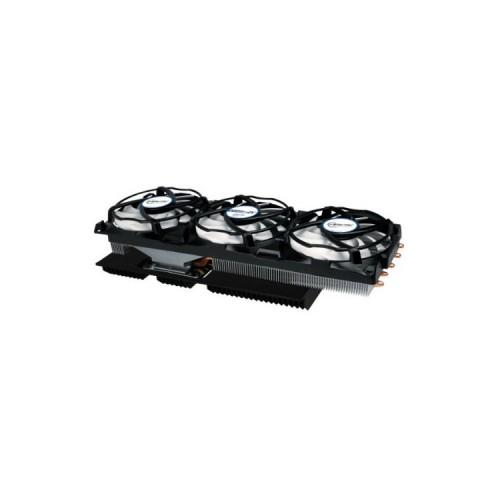
Reassembling the PC once the card is equipped: there it goes bad. Yes it is huge. My turn: a Tai Chi Thermaltake housing already hefty and yet it just came at 2 or 3cm near I should leave the Dremel. Another problem: the radiators in my motherboard which prevented me to go up the card equipped in the first PCIe slot (model: Asus Crosshair Formula2 RoG ed.). The PCIe card is in the middle slot of the blow this time.
Performances once any income in his place final. I connected the ventilos the product on the original connector of my CG. And I have not seen the back of my t ° CG above 50 °, all in an almost absolute silence, nothing to do with the origin. (Not touch overclocking version of my CG is already slightly by default).
The comment Kingzak said the product is 5 or 6 cm from the edge of the side bracket PCI graphics card: I have not had this problem with my card model. And luckily for me because my card would not be back in my housing without additional tinkering. Shown attached: the card into the PCI-e slot at the top so that you can see the clutter. I had to get it down from one floor on the photo because it can not be fully inserted into the slot because of the small heaters built into the motherboard
Important detail mentioned in another comment: if the power outlets at the end of your graphics are superimposed instead of side by side, go your way, you will have big problems to install the top radiator. The manual provided this clear.


![[X Pack 3] Cables Micro USB 90cm High Quality Anker - Cables High Speed 2.0A USB Male to Micro B - Sync and Charging for Android, Samsung, HTC, Motorola, Nokia and more (Black) (Personal Computers)](https://img.tgreer.com/thumb/85x85/b/a9/ba993255c0310854.jpg)