Package Contents: the repeater itself and two installation guides: one in English and one in French.
Connection:
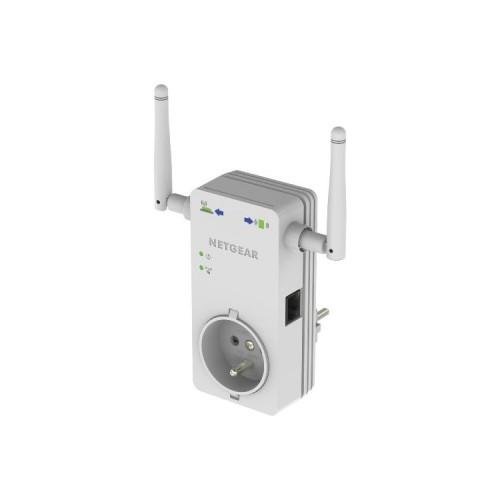
The box plugs into a grounded outlet.
After connecting housing, it must start with a switch on the side of the housing.
Practice Tip: the plug housing is equipped with 2 "keyed" for grounding plug. This allows plug it in both directions (antennas facing up or down).
This allowed me to connect the enclosure to a plug having a valve unhindered by the two antennas.
The housing also has an outlet socket. This allows not to condemn the wall outlet. We can therefore connect a unit above.
Two LEDs on the housing light up green or red.
These two LEDs indicate:
1 / if the case is positioned too far from the wireless source (Freebox) on the electrical grid.
2 / if the material that wants to connect to the repeater network is too far (tablet, smartphone, computer ...).
Also practical, this case is equipped with 2 Ethernet jacks while my CPL Belkin cases not have one.
Software requirements:
Once connected and powered on housing, I connected my PC to the wireless network he created automatically.
I launched Firefox automatically directed me on the configuration interface also in French. Magnificent.
The configuration is done in 3 steps. It was during these 3 steps it takes the name of the network that you want to create (if not created automatically please), we protect it with a password and, importantly, the word pass the "original" network (the one created by the Freebox).
I was really surprised by the simplicity of the configuration.
Operation:
As indicated, the limp is installed in the basement. Here, before installing the casing, WiFi gauge my iPhone was between 3 and 4 bars on 5 total.
With this package installed, I found the 5 bars.
This week I will try to get away from home to try to determine the scope of the case.
In summary I can only recommend this repeater CPL easy to set up and effective.