The replacement tube is a quick guide without images. Below I complete the description by my experience:
To replace the hose, you need a Torx screwdriver TX 10x80, a thin Schaub Dreher, possibly a pocket knife, a Kulimine and a camera (see description), a certain amount of dexterity and a lot of time and patience. The work needs to be careful and performed without much force. Please before starting to read the entire description!
1.Handstück: First, the slide switch in the down position and the underlying plastic slide must be removed. Since both parts are asymmetrical, I have photographed before notching the plastic slide them and the inverted slide switch in the correct position, so I'm going to get any trouble during subsequent assembly. Now, the bottom plate of the handpiece is levered. Based on the pollution you recognize where you can begin to thin screwdriver. Despite little effort the screwdriver left its mark in the soft plastic. After pulling out of the inner part the round tube cuff is levered away. The tube is pushed onto a corrugated pipe (nozzle). So weghebeln the tube from the spout. In the supplied documentation is specially pointed out that due to excessive force breaks the spout! I have now cleaned the parts of the handpiece under the tap with an old toothbrush and scraped the lime.
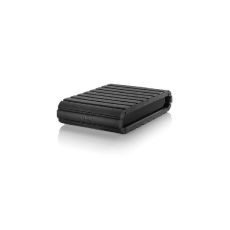
2. Housing: Contrary to the accompanying Quick Start Guide I have now disassembled the chassis. In addition I have removed all the moving parts (lid, storage compartment, wall mount). Please installation position of the nipple to lock the cover note (photographing?). A screw at the bottom and 3 screws on the rear wall to loosen the Torx T10. The housing with a screwdriver pry. On the floor a red rubber ring was near a hole that slipped away. The hose must be removed as the handpiece. In my test with the old combi boiler I have to push the hose from the very free-standing spout at the first attempt, pulled down the spout. Thus the device belongs in the trash. In 6500 WaterJet I therefore first the extent pushed the old hose that he meets as possible perpendicular to the spout and with even more caution levered with a small pocket knife the tube from the spout. The "empty" body parts were also cleaned under the tap. In no case the housing part with the electronics and the pump with water should come into contact !!!
3. Handpiece: Push the hose sleeve for assembly to the new hose. I followed the tip with the pens to widen the hose. When pushing on the hose and then the cuff I had to tilt fear and thus demolish the spout. But it all went well. Hook the hose in the guide, push the inner part by means of the guide rails engage the plastic slide in the lower position and press on the rubber plate - the handpiece is ready.
4. Housing: The old inner tube is about 1.30 meters long. I have decided not to cut the new hose with a length of 1.5 m. First, the old inner tube must be pulled from the housing opening and introduced the new. In addition I have bent apart with a small screwdriver to clamp the hose outlet something. Attach hose sleeve, stretch hose end with Kulimine and assemble as in the handpiece. Then the stubborn new hose as far out of the housing to abut anywhere. Prior to assembly, the red I clamped rubber ring on the end of the axis of the large gear. Bit fiddly was the insertion of the nipple with spring to lock the lid. The winding up of the hose is not easy. Maybe I should have cut him yet?
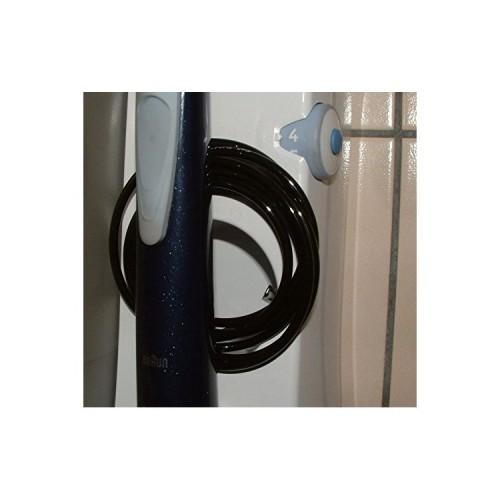
5. Test: In a first test worked the oral irrigator with the new hose as expected. Since it is not spiral hose, coiling is a problem. Finally, it should be noted that one can only observe the installation time of 15 minutes, if you do not this work carried out for the first time. Otherwise, a good solution at a fair price.
6. After a week of use, I'll cut the hose to the handpiece by 40 cm in order to counteract the mess up the hose while the counter use.
Addendum on November 20, 2014
I did not cut the hose. So I have to roll up the hose after each use with the handpiece.
A few weeks ago the pulsating waterjet my oral irrigator has changed in a trickle. The water tank was not empty. When searching for a solution I came across the Redesept cleaning powder, encountered 150 g. After instructions once applied and the unit "purr" as usual. I hope to be able to use the irrigator far by tube replacement and the cleaning powder.