Because there is no manual, you have to the Internet make knowledgeable and, unfortunately, not everything is as told correctly! So one must not remove the memory modules, if you do not also want to swap the memory on the occasion. The power supply is also so out! And afterwards you also need time for the configuration. Overall, I gained almost 2 hours needed incl. The necessary software adjustments.
Previously I had dubbed at CCC the functional content of the HD to the first externally connected SSD incl. The recovery partition. Took 30 minutes, incl. A few less programs and a few data.
The HD has the square with the SSD swap! The cable from the first drive connection is better and shorter and good for the SSD.
The HD moves "up". For this purpose it is necessary to disassemble the entire unit. That goes with the tool. The plugs are very tiny and all cables thin and delicate. I also have taken a pair of tweezers to help. I had not thought that there is such a fine job. This is only possible with care and in peace!
The gums .. well, I then turned to the purely internal frame.
The HD has remained in a paper cover. I have left to protect it, but 2 holes for the screws are needed.
The set includes 2 set screws, I've screwed to the "back". The screws of the HD come indeed to the SSD, because it is held without a condom in the rear housing in 2 holes.
To insert the SSD later immediately suitable, it is practically in advance a "check card" to put under and to push them over, so that the holes are made immediately and then pull out the card again. Finished!
The cables are so sensitive and do not try to bend or strain. The installation of power supply and motherboard went. Everything is just very tight and you have to carefully move it so long that it fits again.
Only comes in the SSD and then the Hauptplatinenbefestitungsschraube (if you can see that everything fits) and then the black part of the air supply. This plastic part disturbs otherwise above the SSD installation and is located at the end via the HD connectors on the motherboard. Also see that you get stuck from the LED and IR receiver the tiny connector.
At the end I still had trouble to attach the plate for the wireless antenna again. On my machine that sits very tight and is connected to the aluminum housing and clamped it was a bit of fumbling, that it fits so again. However, it fits really well! You do not need violence.
Quality: All parts and screws in the device are delicate and aluminum is also not as strong as steel or anything sensitive. It's a wonder that there are so good funktioinert and holds.
For me, the Mini has immediately booted from the SSD and recognized the HD! I then checked that the SSD is the boot drive.
For non-Apple SSD "TrimEnable" is required. That worked great.
Thanks to CCC the recovery partition was created and works.
A few ideas yet: It is sensible to create a previously bootable USB stick with ML, if you want to reinstall times .. or SSD times fails completely, which indeed can happen. In addition, you can then re-set the SSD dramatically. And it will save you the long wait until the 4.7 GB on the Internet they are big!
I have copied with CCC also Recoery on the internal HD, so they do not get lost. You can also undo the Terminal and diskutil. Since there is a guide on the internet. The Parition's otherwise inaccessible!
The wizard of Apple copied an existing "recovery .." to another medium. On a USB flash drive I have the recovery now also. I have other Apple devices. This is a certain security.
So, I now have 500GB SSD fast for the system and the processing data in the video editing with iMovie and FCE. 4
Boats instead of 40 seconds, the Apple HD now 17 seconds Start all programs in rapzap!
I can thank 16GB RAM connect 2 monitors; 4 GB are not enough, because the video memory still going on.
The HDMI connector is good with me at large resolutions with a normal monitor anything, but with me only on the small screen with the supplied adapter.
Fortunately, the Thunderbolt port goes smoothly. The picture is so flawlessly. My monitors I also calibrated immediately, because the colors and the display differ depending on the connection. HDMI is worse with me.
A fusion Drive I do not like because of the failure of a disk can then lose all the data and more background processes to deal with the way Herverschieben. For video editing that is already less than the solution of a pure SSD. It has full control, the movement data is only on the SSD. The raw data and the results I have then on the HD which has quite good space with 1TB.
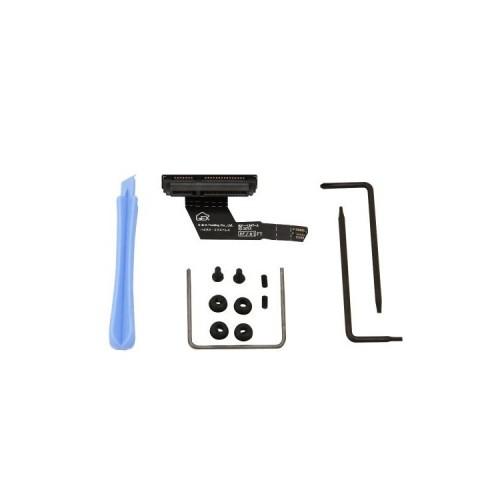
In this respect, I have thanks to this Flex Cable Kits now a useful working tool.
2.3GHz i7 or 2.6GHz i7? I have the standard of 2.3 GHz, which is also intended for the Mini server and the device will remain when rendering still relatively quiet. So well suited for continuous operation. You can tell when loaded that the heat increases and the fan runs noticeably but without being distracting. The small enclosure me is dear. Actually you need for HD editing much more power.