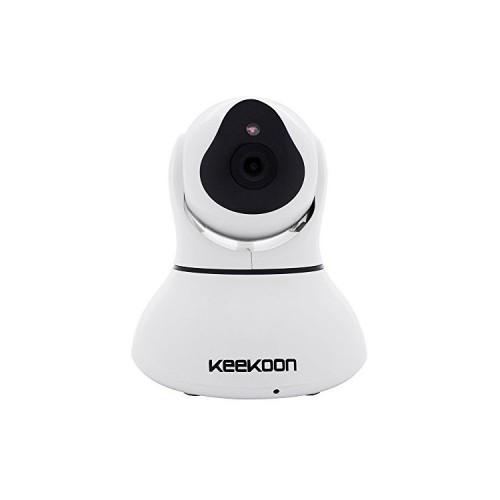
I want / you describe to you here my experience with the Keekoon IP indoor camera T2 in white.
The delivery is next to the actual camera a wall / ceiling mount with mounting hardware, a permanently installed WLAN antenna, a power supply, a one meter long LAN cable, an alarm connector, two relatively detailed instructions (one in German) and a software CD.
On the back while a microSD slot is available, but unfortunately no card was.
The camera itself makes a relatively high-quality impression.
The case is in my model made of white glossy plastic, which as usual is unfortunately very susceptible to fingerprints and dust with this material.
On Lens but you can see only the IR sensor is not as usual the built IR LEDs.
These are in the black plastic eye "hiding" and visible only when activated with 10 red LEDs.
The operation is indicated by a purple light on the front (can be setup in Blink, steady light or all issued)
A 3,5.mm plugs for audio In or Out (in the manual does not explain, and the connector for an alarm system are housed in the back.
There is also the power connector and the LAN port.
Commissioning is relatively simple. There are two routes to the destination.
The camera is always simply connected to the AC adapter and the LAN cable.
About searching the LAN:
One can, after a few seconds (the camera takes only a self-test) either the search tool IPCamera.exe install from the CD and find the camera or equal in your own router look (AVM example in the overview under the item Network or under the menu Home Network / Network) has been assigned which IP address the camera.
By clicking in the search tool on the found entry or the entry of the assigned by the router IP address in the browser (IE, Firefox, Chrome) then you get to the user interface of the camera.
To then have to be installed to see the awaited first live video, depending on the browser still several plugins.
But it will be directly pointed and the necessary setup files linked.
Both are in the manual also well described and easy to perform.
You then connect to the web interface diverse functions and settings can be used and performed there.
The user interface called IPCam provides a live video (1, 4 or 9 points) and right next to a control panel for a quick snapshot image, a video function, Pan & tilt controls, mirrors, brightness, contrast, listening, speaking, etc.
The PTZ control is extensive: Tilt up / down and left / right, and HSCAN VScan and stopping and starting and saving 6 possible positions.
Behind the gear icon to see extensive configuration options such as
- System: Information on the camera / Date-Time / User Management / IR on-off / PTZ / System log / language setting / Restart reset / backup (useful for multiple cameras) to upgrade the firmware and option
- Network: IP Configuration / WLAN / P2P / AP
- Alarm: Actions / SMTP e-mail / FTP / Audio alarm / SD card / recording path
- SD card: Recording / scheduling / Format Card / Document Management
- Multi Camera: managing multiple cameras
All in all, quite an impressive variety of information and settings.
Here I lacked only the definition possibility for alarm areas and an online update for the firmware.
About the app:
With the app from the App Store or P2PLiveCam the Play Store you can add on the + sign a new camera. These then easily scan the QR code on the bottom of the camera with the smartphone / tablet and submit UID then found and connect with the camera.
Then you can define basic radio ions such as live video, alarms, PTZ, passwords and WiFi access.
You can also connect via the app directly to the camera when there is no LAN cable is connected.
(That would be even the third possible connection path)
Then automatically the WLAN is activated and the desired network can be entered in the app.
I would like to highlight the following points:
The camera can also function as stand-alone Access Point AP. So you can build this, so to speak on a greenfield site and the image then received with the smartphone / tablet. A nice extra feature.
A firmware upgrade does not work automatically on the WebUI. Since I have no web link found eliminates the point new firmware until I return an info from manufacturer have.
In Wi-Fi, there is a significant delay of the live video, despite an almost perfect connection (router right next to it).
The H and V scan ran with 6-8 seconds delay, which I find really unacceptable.
Under the item P2P apparently its own DynDNS service is offered for free.
Although I could also use the my AVM Fritz box but not everyone has this option.
By using the built-in speaker and microphone, you can build a simple intercom or a baby monitor with the PC or Smartphone.
It is possible to send the files generated when the alarm on an FTP server. Useful for NAS owner!
Recording of series of photographs or videos by schedule: Also easily set up and very useful to eg every night or at the weekend to take days just controlled with short absences.
The third-party app Tiny Cam Monitor has not recognized the camera on automatic search run.
Even a manual integration has not been possible for me, what I find very sad.
All in all I think this surveillance camera for recommended.
However, the severe delay in WLAN mode, the lack of online firmware update function, the lack of alarm range definition and the non-recognition by my preferred app TinyCam lead me to a star deduction.
So I give good four stars for this camera.
I hope this review could assist you in your buying decision ...